Solar Thermal Installation Process
In any installation process, regardless of the type of system and panels being installed, there are 3 main stages – pre-installation, the installation itself, and post-installation. Throughout these installation stages, ensuring you’ve chosen a reputable and certified installer, such as SolarTherm UK, will take the hassle out of any installation.
Pre-installation
The pre-installation stage is the most important in any installation. This stage typically involves research by the homeowner or business owner (possibly what you’re doing right now) on whether they feel solar panels are right for them. During this stage and when deciding on an installer, it’s important to consider:
- Are they a certified installer? Ensuring they are MCS-accredited is important as this will ensure eligibility for payment and incentive schemes, as well as ensuring the installation is of high quality.
- Type and size of the solar system. Ensuring that the solar panels are installed to meet your household or commercial requirements is important. Installing a system that is too large may result in underutilisation and therefore lower efficiency, as well as a larger installation cost. At SolarTherm UK, we perform an assessment to ascertain your consumption needs. This allows us to recommend the size and type of solar system to meet your requirements and provide the greatest level of savings.
- Get a quote. Ensuring you’re happy with the quote for the installation of solar panels is important. It’s also important to consider that the cheapest quote isn’t always the best! Ensuring that you go with a reputable and certified supplier that offers good quality service should be important considerations if choosing between quotes.
Installation
There a 5 main parts during the installation process of solar thermal panels. Depending on the size of the installation, it can take several days to fully complete the installation. Small systems typically take between 1-2 days, whereas large systems can take longer. During periods of the installation process, you may be without hot water.
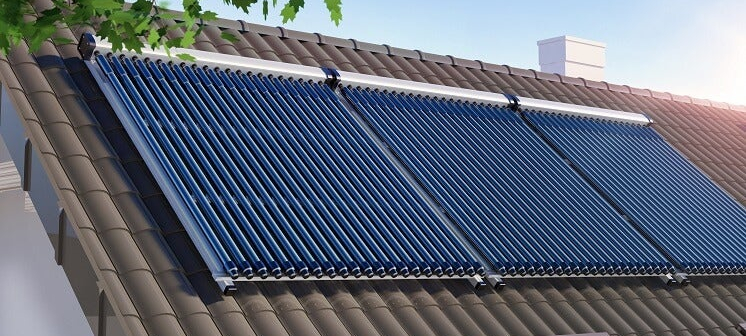
- Installation of the panels
The first stage of the installation process is fitting the panels to the roof. This involves fitting the roof brackets upon which the solar panels are attached. There are a variety of mounting methods, each of which is designed for a particular installation location. Typically, roof brackets are directly fixed into the roofs rafters to ensure the panels are fixed securely and remain integral to the building. With solar evacuated tubes, the heat transfer unit is initially fitted, and the tubes are then connected after the rest of the system has been installed.
- Heat storage/hot water cylinder
This stage will vary from installation to installation depending on what type of hot water cylinder is installed within the property. Also, depending on whether a direct or indirect solar thermal system is installed, the requirements of the hot water cylinder may vary. Where a new system doesn’t have to be installed, this stage will involve the installation of a new dual coil water cylinder, pump and control system. If a new hot water cylinder is required, this stage will involve the fitting and connections of the new cylinder, including pump and control systems.
- Plumbing/Piping of the solar thermal system
This is the stage that connects all of the individual elements together to create a closed-loop between the solar panels and hot water cylinder. Within this stage, several other components need to be connected such as the pumping station and the expansion tank.
- Electrics and control system
During this stage, the control systems are fitted and set up in conjunction with your solar thermal system. The control systems work in conjunction with your pump to determine whether the heat in the panels is hotter than that in the hot water cylinder, ensuring the pump is only activated when efficient. If opting for renewable heat incentive (RHI) payments, installing a generation export meter that is MCS-certified is required. The generation export meter will measure the volume of heated water generated by your solar thermal panels and determine payments through the RHI.
- Pressurising the system
The final stage is filling and pressurising the system with heat transfer fluid. This fluid has been specially formulated for use in solar thermal systems, designed to cope with an operating temperature between -25°C - 200°C, as well as being non-toxic and biodegradable as to not damage any of the internal components within the system.
Post-installation
Following the installation of solar panels, your installer will register your solar thermal panels with the Microgeneration certification scheme. This will provide you with the documentation required if applying for schemes or RHI payments, if applicable.
Solar Thermal Installation with SolarTherm UK
At SolarTherm UK, we have completed thousands of solar thermal installations across the UK. With thousands of satisfied customers savings thousands on their energy bills, we have a 5* reputation for quality and customer care through the installation process.
To find out more about solar thermal panels or to get a quote, contact us today. Our engineers are fully qualified and have the latest tools and training to ensure your solar system will be producing free green energy for decades to come.